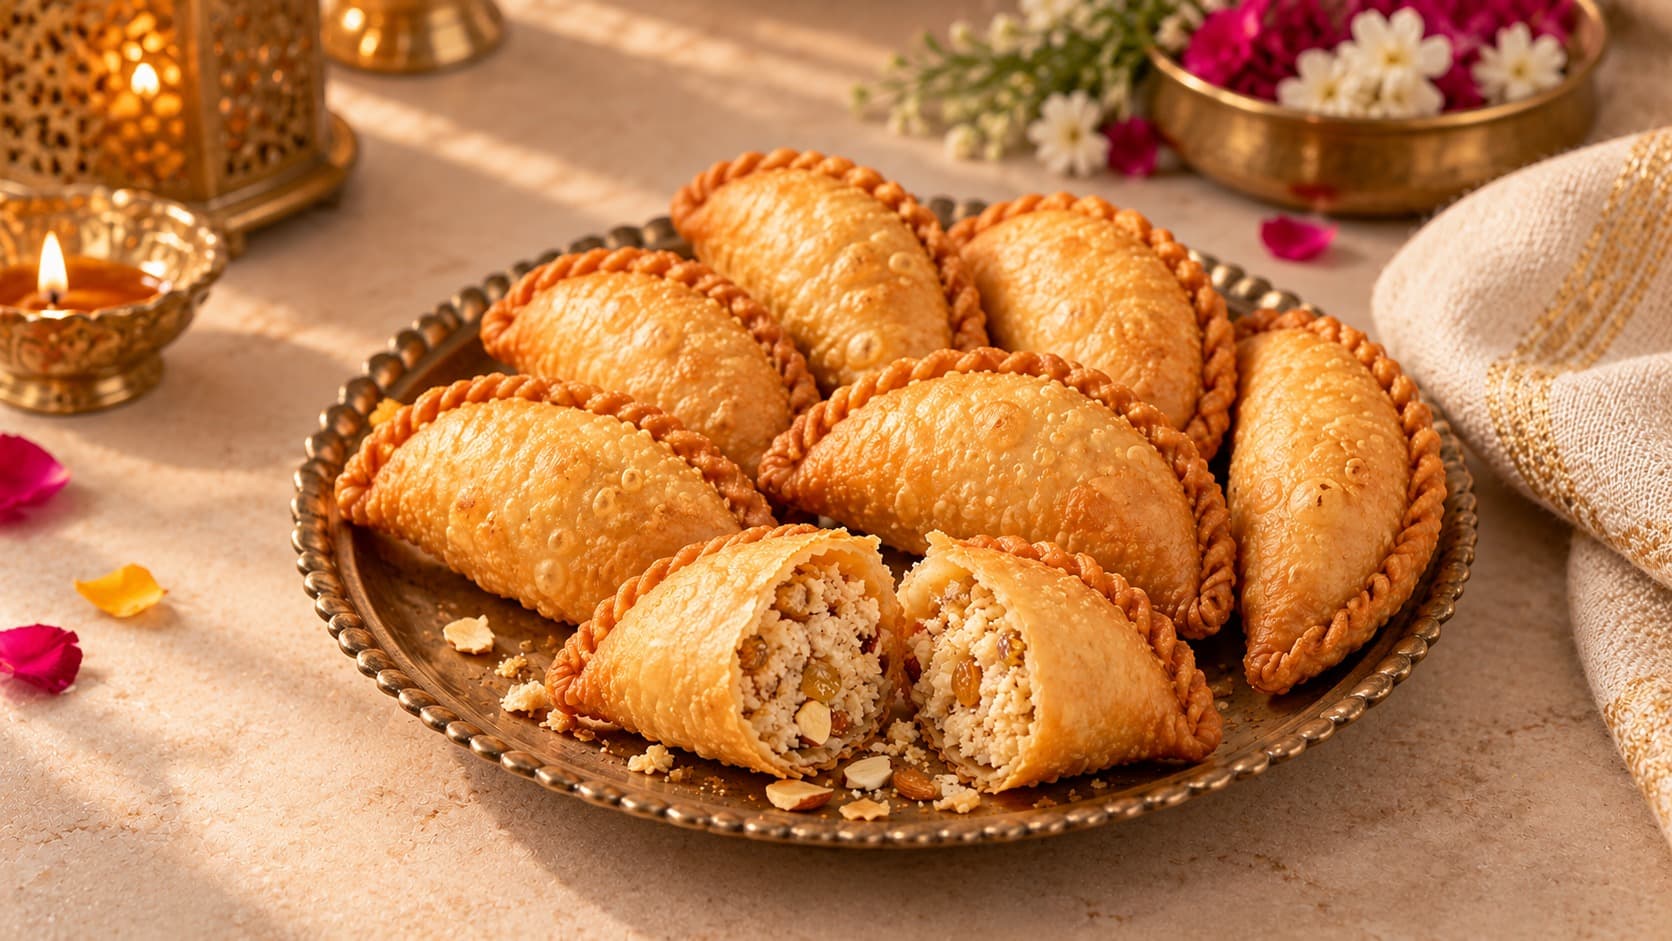
Gujiya is a beloved Indian festive sweet featuring a delicately crisp, flaky, golden pastry shell filled with a rich mixture of roasted khoya (mawa), powdered sugar, coconut, nuts, and fragrant cardamom. Each beautiful crescent-shaped pastry has a tender, sweet, slightly crumbly filling enclosed within a golden crust finished with traditional hand-crimped edges. This homemade version combines the classic North Indian mawa gujiya technique with a touch of coconut, creating a delicious festive treat reminiscent of the closely related Maharashtrian karanji, perfect for Holi, Diwali, and special celebrations.

Md Afroz Alam
0 followers
50
Cook Time
16
Servings
0
0 reviews
Medium
Difficulty
Measure 250 grams of all-purpose flour, 45 grams of ghee, 90 ml of water, and 0.25 teaspoon of fine salt. Place the flour and salt in a large, wide mixing bowl and stir to distribute the salt evenly. Warm the ghee gently until it has completely melted but is not excessively hot. Keep the water nearby for gradual addition. The correct ratio of flour, fat, and water is essential for the characteristic crisp, flaky outer shell of traditional gujiya.
Use regular refined wheat flour (maida) for the most traditional delicate pastry. Adding too much water creates a soft dough that can produce a tougher or less flaky shell.
Pour the warm melted ghee over the flour mixture. Using your fingertips, rub the ghee thoroughly into the flour for approximately 3–4 minutes until the mixture resembles fine breadcrumbs or slightly damp sand. Pick up a small handful and squeeze it firmly in your palm. It should briefly hold together in a compact shape before crumbling when disturbed. This traditional process of incorporating fat into flour is called moyan or moen and helps create the characteristic short, delicate, flaky texture of gujiya pastry.
This stage determines much of the final pastry texture. Coat the flour evenly with ghee before adding water rather than simply mixing everything together at once.
Add the measured 90 ml of water gradually in several additions, mixing with your fingers after each addition. Bring the flour together into a cohesive mass and knead gently for approximately 3–5 minutes until it forms a firm, smooth dough. The dough should be considerably firmer than ordinary chapati dough and should not stick to your fingers or the bowl. Press it firmly together without excessive kneading. If the dough remains crumbly after the measured water has been incorporated, add a few extra drops of water only if essential for binding. Shape the finished dough into a compact ball.
Avoid making the dough overly soft or elastic. A firm dough with properly incorporated ghee produces a crisp pastry that maintains its crescent shape during frying.
Place the dough in the mixing bowl and cover it with a clean, slightly damp kitchen towel or a tightly fitting lid. Allow it to rest at room temperature for approximately 25–30 minutes. During this time, the flour hydrates evenly and the dough becomes easier to roll without losing its firm structure. After resting, knead it gently for approximately 20–30 seconds to smooth the surface. Keep it covered until ready to shape the individual gujiyas.
Never leave the dough exposed to air while preparing the filling. A dry surface can develop cracks when the dough is rolled and folded.
While the dough rests, finely chop 25 grams of almonds, 25 grams of cashews, and 15 grams of golden raisins. The pieces should be small enough to distribute evenly inside the filling without piercing the thin pastry. If using the optional desiccated coconut, place 20 grams into a dry skillet over low heat and toast for approximately 1–2 minutes, stirring continuously until it smells lightly aromatic. Do not allow the coconut to turn dark brown. Transfer it immediately to a plate and set it aside. Keep the prepared nuts and raisins ready for mixing with the cooled khoya.
Finely chopped nuts give pleasant texture without forming sharp pieces that could puncture the pastry. Coconut adds a subtle connection to Maharashtrian karanji, where coconut is often the main ingredient in the filling.
Place a heavy-bottomed nonstick skillet or kadai over low heat and add 5 grams of ghee. Once melted, add 250 grams of crumbled or grated unsweetened khoya. Stir continuously using a sturdy silicone spatula or wooden spoon for approximately 5–7 minutes, breaking up large lumps and scraping the bottom of the pan. As the khoya warms, it will initially soften and become slightly pasty. Continue roasting gently until excess moisture evaporates, the mixture becomes cohesive and slightly crumbly, and a rich, lightly toasted milk aroma develops. The khoya should remain pale cream to very light golden, without deep browning or burnt patches. Remove it from the heat when it begins gathering into a soft mass and no free moisture is visible.
Roasting khoya removes excess moisture and enhances its natural milk flavor. Avoid high heat, which can scorch the milk solids and make the filling bitter. Moist filling can soften the pastry or cause the gujiyas to split during frying.
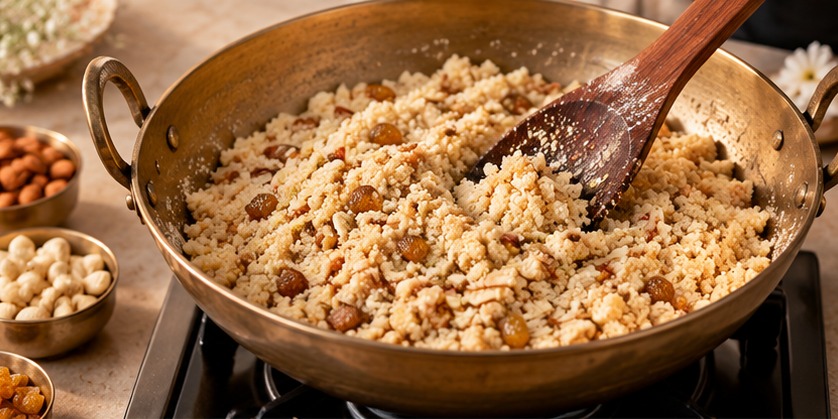
Transfer the cooked khoya immediately to a wide, clean, dry mixing bowl or shallow plate. Spread it into a relatively thin layer and allow it to cool for approximately 15–20 minutes until it reaches room temperature. Stir occasionally to release trapped heat and prevent condensation. The cooled khoya should feel soft and slightly crumbly, without visible liquid or excessive stickiness. Make sure it is no longer warm enough to melt powdered sugar before proceeding.
Never mix powdered sugar into hot khoya. The heat can dissolve the sugar and produce a sticky filling that releases moisture during frying. Cooling completely helps maintain a delicate, crumbly interior.
Add 90 grams of finely powdered sugar to the completely cooled roasted khoya. Add the chopped almonds, cashews, and raisins, along with the optional toasted coconut if using. Sprinkle in 0.5 teaspoon of ground green cardamom and the optional pinch of nutmeg. Mix gently but thoroughly with a spoon or clean fingertips for approximately 2–3 minutes until all ingredients are evenly distributed. The resulting filling should have a soft, slightly crumbly, granular texture, with visible small pieces of nuts and raisins throughout. It should be sweet and fragrant without feeling wet, syrupy, or excessively sticky. Divide the filling mentally into 16 approximately equal portions so that each gujiya receives a consistent amount.
Traditional North Indian gujiya is primarily khoya-based, whereas Maharashtrian karanji commonly features coconut, nuts, sesame, or poppy seeds. This recipe remains a mawa gujiya, with optional coconut providing a gentle regional variation.
Place the rested dough on a clean, dry work surface and divide it into 16 approximately equal pieces. Roll each piece briefly between your palms to create a smooth ball, keeping the remaining portions covered with a slightly damp cloth. Working with one ball at a time, use a rolling pin to create a thin, even circular disc approximately 10–11 cm (4–4.3 inches) in diameter and about 1.5–2 mm thick. Roll gently from the center outward, rotating the dough occasionally to maintain a round shape and even thickness. Avoid using additional dry flour if possible; a very lightly greased rolling surface can prevent sticking. The rolled pastry should be smooth and flexible, without tears or extremely thin areas.
Even thickness is important for consistent frying. Pastry rolled too thick can remain doughy, while pastry rolled excessively thin may break when filled.
Place one rolled pastry circle flat on the work surface. Add approximately 1.5–2 tablespoons of the prepared khoya filling onto one half of the circle, leaving a clear border of approximately 1 cm (0.4 inch) around the curved edge. Gently gather the filling into a compact, slightly elongated mound without pressing it into a hard paste. Lightly moisten the clear outer edge with a very small amount of water using your fingertip or a pastry brush. Carefully lift the empty half of the pastry and fold it over the filling to form a traditional half-moon or crescent shape. Align the edges carefully, ensuring the filling remains fully enclosed inside the pastry.
Do not overfill the pastry. Excess filling can prevent a proper seal and may burst through the shell during frying. Keep the sealing area completely free from khoya, nuts, and sugar.
Press the overlapping curved edges firmly between your fingertips to create a continuous seal. Starting from one corner of the crescent, pinch a small section of the sealed edge, fold it inward over itself, and press gently to form the first decorative pleat. Repeat along the entire curved edge, overlapping each small fold to create the traditional hand-crimped rope-like pattern known as a pleated gujiya edge. The finished pastry should have a softly domed center enclosing the filling and a neatly reinforced, decorative crescent border. Alternatively, use a clean gujiya or karanji mould to press and seal the edges securely. Inspect each pastry carefully for visible openings or weak spots.
A properly sealed, pleated edge is both decorative and functional. It prevents the filling from escaping into the hot oil. If using a mould, press firmly enough to seal without cutting through the filled center.
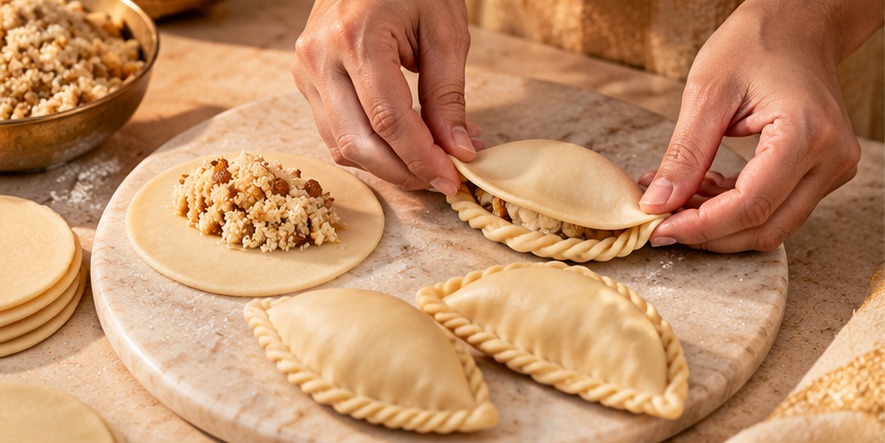
Arrange each shaped gujiya in a single layer on a clean, lightly greased or parchment-lined tray. Leave a little space between the pastries so they do not stick together. Cover them loosely with a clean, slightly damp kitchen towel while shaping the remaining dough. Repeat the rolling, filling, folding, and crimping process until all 16 gujiyas are assembled. Before frying, examine each crescent for cracks, loosely attached corners, or exposed filling, and press any imperfect seals closed with a lightly moistened fingertip.
Do not allow uncooked gujiyas to dry out. Dry pastry may crack when it expands during frying. Also avoid stacking the uncooked crescents because their delicate surfaces can deform or stick together.
Pour approximately 800 ml of neutral sunflower oil into a deep, heavy-bottomed kadai or appropriately sized saucepan, ensuring the oil remains well below the halfway mark of the vessel. Heat over medium-low heat until the oil reaches approximately 300–320°F (150–160°C), checking with a kitchen thermometer if available. The correct temperature should produce gentle, steady bubbling when a small piece of pastry dough is dropped into the oil. The test piece should gradually rise to the surface without immediately turning dark golden. If it sinks and remains motionless, the oil is too cool. If it rises violently and browns almost instantly, the oil is too hot.
Temperature control is crucial. Very hot oil browns the outside before the pastry layers cook properly, while excessively cool oil can make gujiyas greasy and soggy. Never fill the frying vessel too high, and avoid introducing water into hot oil.
Carefully lower 2–3 gujiyas into the hot oil, depending on the size of the kadai, without overcrowding. Maintain the oil temperature around 300–320°F (150–160°C), adjusting the burner between low and medium-low heat as necessary. Fry gently for approximately 6–8 minutes per batch, turning the gujiyas carefully with a slotted spoon every 1–2 minutes so they cook evenly on both sides. The pastries should gradually puff slightly and develop a delicate pale golden to warm golden-brown color. The outer surfaces should become dry-looking, crisp, and lightly blistered with tiny natural pastry bubbles. Avoid deep brown patches or dark frying marks. Continue frying until the gujiyas are uniformly golden, firm, and visibly crisp.
Frying slowly at a controlled moderate temperature helps develop a crisp, flaky pastry without a raw or chewy interior. Do not overcrowd the pan because too many pastries lower the oil temperature and may cause uneven frying.
Using a slotted spoon, carefully lift the golden gujiyas out of the oil and hold them briefly over the kadai to allow excess oil to drain. Transfer them onto a wire rack placed over a tray, or onto a plate lined with absorbent kitchen paper. Arrange them in a single layer rather than stacking them while hot. Allow the pastries to cool for approximately 20–30 minutes, until the shells become fully crisp and the filling is no longer hot. Repeat the frying process with the remaining batches, allowing the oil to return to the correct temperature between batches. Once cooled, the finished gujiyas should have a firm, flaky shell and a rich, slightly crumbly, fragrant sweet filling.
A wire rack allows air to circulate around the pastry and helps preserve crispness. Avoid sealing hot gujiyas in an airtight container because trapped steam creates condensation and softens the outer shell.
Arrange the completely cooled gujiyas on a clean, shallow ceramic serving platter or traditional Indian mithai plate. Place them in a natural, gently overlapping arrangement that highlights their distinctive crescent shapes, softly domed centers, golden pastry surfaces, and beautifully hand-crimped borders. Serve at room temperature as a festive dessert or sweet snack. The ideal gujiya should break with a delicate, crisp bite, revealing a creamy, slightly granular khoya filling with small pieces of nuts, raisins, and optional coconut. Its flavor should be gently sweet, buttery, nutty, and fragrant with cardamom.
Gujiya is especially associated with Holi celebrations in North India, while the closely related karanji is widely prepared during Diwali and other festivals in Maharashtra. The crisp pastry and rich filling are best enjoyed at room temperature.
Once the gujiyas have cooled completely, transfer them into a clean, dry, airtight food-storage container. Because the filling contains fresh khoya, do not store these pastries at room temperature for extended periods. Refrigerate promptly, within 2 hours of cooking, and consume within approximately 2–3 days for best quality. Place parchment paper between layers if stacking is necessary. Before serving refrigerated gujiyas, allow them to lose some of their chill, or warm them in a preheated oven at approximately 300°F (150°C) for 5–8 minutes to refresh the pastry's crispness. Cool briefly before eating because the filling may become hot.
Khoya-filled gujiya is more perishable than dry coconut-and-semolina karanji. Refrigeration is important for food safety, especially during warm or humid weather. Do not leave dairy-filled sweets exposed at room temperature for an entire day.
Join the conversation
Log in to commentNo comments yet
Be the first to share your thoughts on this recipe!